Hello friends. How have you been ?
I’m delighted to share with you guys a new development – I have been designing handmade statement jewelry !!! What a leap – in terms of creativity, atleast !!!
Please drop me a like at https://www.instagram.com/madelineposh/
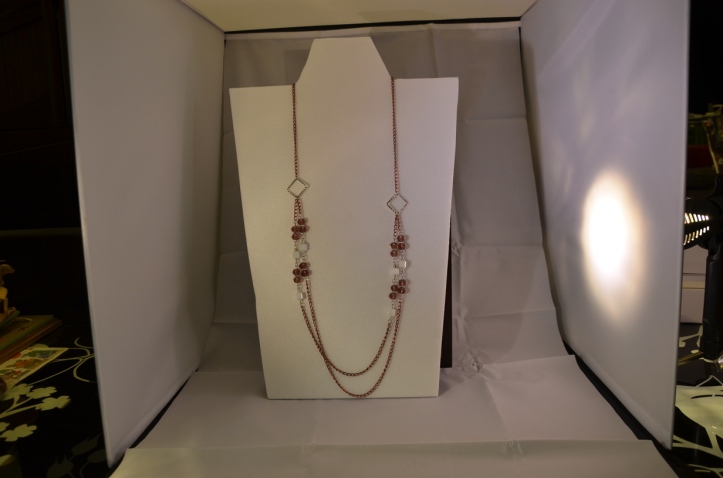
We held a trunk show at The Villa a few months back; the details of which will be in an upcoming post. One of the things, that I realized is that most of my necklaces were long and most of the display stands, I had, were short display units for the table stands. Hence, I improvised.
I bought some white foam sheet and designed a display stand – however, quickly I realized that the stand was not large enough, inorder to allow my neck pieces to hang freely.
Also, it meant that I would need to make atleast 70 of these boards ! Plan A did not work out.

Plan B – I’ve stored several bulletin boards (cork ones) in the shed. Time to make use of them.
I decided that these bulletin boards would be ideal since they could carry multiple strands and would be sturdy as well. However alittle prepping was in order. Here are some photos explaining what I’ve done.


VOILA !!!
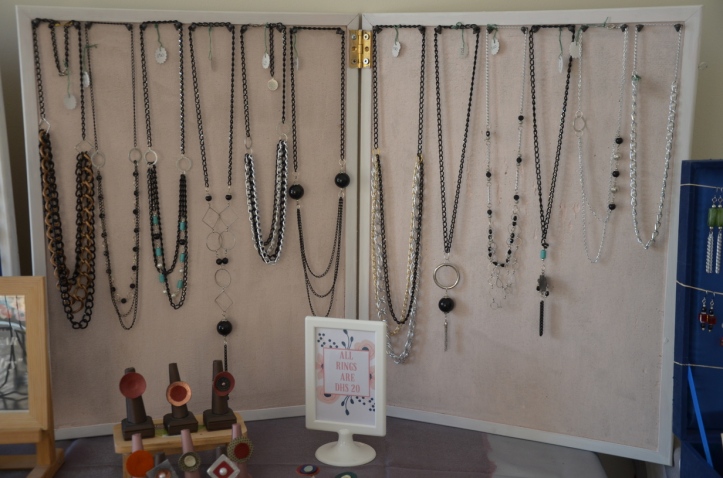


I love the look and how perfectly, everything fit in.
These are easy to store and very convenient to carry around too.
The length of the boards, helps to bring out the flow and drop of the necklaces.
Its a win win situation for me.
I love upcycling and I love to repurpose mundane objects. How about you ? What was your last upcycle project ?
I am sharing this post with all my blog friends here.
Thank you for visiting me today. Have a lovely day and be sure to subscribe to my blog (top right column) and my instagram here.
HTTPS://WWW.INSTAGRAM.COM/ARTYCRAFTYNAUSH/
Alternatively you can ‘like’ or ‘join’ me on the various platforms below 🙂


I think your list of blog link parties that you share at is even longer than mine! Visiting from #InspireMeMonday.
Those are beautiful display boards! I love how the background colors you chose really make the jewelry stand out.
Thank you. I’m glad you liked the boards. I used the peach/pink background for darker shades of jewelry like black, while silver jewelry is hung against the blue black drop to bring out the colors.
Thanks for sharing with us at the To Grandma’s House We go link party!
Thank you for visiting Tarah.
Super cute how they turned out! Love the bulletin board displays with the jewelry on them. Thanks for sharing at the #inspirationspotlight @dearcreatives Pinned and sharing. See you again soon.
Thank you dear.
These are great ideas. I have a friend who’s into jewelry making and she’s always struggling with her displays, The cork board would be just perfect for her.
Thank you for sharing at The Really Crafty Link Party. Pinned.
Thank you for visiting me and your lovely comment, Teresa.
[…] DIY Jewelry Display Stand,shared by Doodle Buddies […]
I love this idea!
Thank you Julie.
[…] bulletin boards into display board […]
These are great! Thanks for sharing at Vintage Charm!
How well do they stand up to wind? I use bulletin boards for my display for my earrings at this time they are not hinged together, and on the stands I have them they are always being blown off my table.
Emily, I placed a brick behind the board and one infront of it for support. It got the job done 🙂